Predecessor Builds > Khaimera > Beast Mode


He Jumps, He Swings & He Kills
Welcome to the Khaimera Build you have all been waiting for. This dude slaps and he slaps hard, all while keeping his health pretty damn high. This dude is the broken mf you run into on MMO games which make you rage quit. He'll jump on you for a slowdown, swing fast to bring you to your knees and if anyone tries to help, his AOE Ult will stun those jerks too. Nobody is allowed to mess with your kills. Nu uh. THAT'S AGAINST THE RULES!
If you die to a group of people trying to mess up your killstreak with a full on 5v1, report them because that's cheating and the T1 tower probably cross mapped you for the finishing kill. When you play Khaimera, the game should be an automatic win
BUILD BREAKDOWN
So when it comes to Khaimera, most people tend to focus on his attack speed, damage, and sustain, well I say you don't need to focus on that garbage because the trick with Khaimera is all in his health baby.
Hi Health/Hi Regen
The purpose of his kit is to keep regen high, chase people down and stick around in fights longer. His passive is extremely simple in the way it produces more regen the higher your stack goes (It caps at 30 stacks because devs were scared of his true potential)
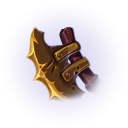
There are items in the health category that make you do more damage, specifically Overlord. With this single item alone, you're going to become a powerful dude.
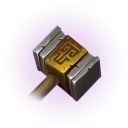
Add Bonesaw into the mix and you got yourself a fast swinging maniac leaping on fools.
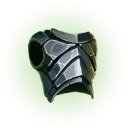
The Crest Saphire's Mantle is a MUST HAVE to make this build work, if you don't understand how it works, I'll tell you this, you leap in on a group of people, you use it and bingo bango bongo you gained more health permanently, damaged anyone within that AOE and increased your physical damage stat because of Overlord.
That is why these 3 items are MUST HAVES for this build to go BEAST MODE. (omg he said the name of the title)
You can of course use the base build to get your feet in the water, but if you want to understand why there are multiple modules, it's because there's more science to this build than you think. Queue the Bill Nye intro!
When it comes to most builds, you are left with all these different options on ways you can change up the build to better fit your playstyle, well I'm here to tell you that those modules mean jack shit if they have 0 explanation as to when you should use those modules, or what items you swap out and why. They all deserve dislikes if they do this to you. (don't actually spread the violence of dislikes)
Time to breakdown these modules in a simple manner.
LAST 3 ITEMS
- The last 3 items should go like this: Physical Protection, Magical Protection, Health
Simple as that. Is it though? Which items should we consider for any of these.
Crit Counter Module
Well boys and girls, the truth of the matter is that sometimes you end up in team comps where there's 3 douchebags with full crit builds and your going to get melted, so the way to counter this is to use your physical protection item slot and place the first crit item suggested in that crit counter module. This is enough to reduce the impact of 1 of those little sausages trying to slap you around. If there is only 1 magical hero on the enemy team though, and you have multiple crit wieners, I recommend taking both items in that module and just forgetting about the magical protection slot all together
High Physical Counter Module
Let's say, for example, there's 1 magical enemy, and they hit hard. They placed everything in damage. 90% of the time this just means that they're squishy. In cases like this, is it worth getting a whole magical item for them? Simply put. No.
Lets also say, for example, that all of these people on the enemy team don't have any crit. Perfect! This is where you take the 2 slots for your physical item and magical item, go to the high physical counter module and slap on both those items.
High Magical Counter Module
This is something I feel you'll rarely see, but sometimes it happens. Teams like this tend to be somewhat coordinated. They try to put all their energy into High Damage outputs, so they can get you to focus on them and not the ***** crit slapping your whole team. This is a risky, but beneficial opportunity for you to put your energy in focusing the right counters for magic, then helping your team 5v1 that crit clown.
Replace the 2 slots for physical and magical with the 2 suggested items in that high magical counter module and you should be golden. Don't do this unless there is at least 3-4 enemies with magical damage.
Conclusion
I hope I helped you suck less with Khaimera in this V0.16 update, and gave you some valuable tips on how to rock this build to its fullest. If you need tips on how to actually play Khaimera better, pop into my stream and tell me I suck. I'll show you something.